
9 Thanksgiving Crafts for Preschoolers Using Stuff You Already Have
Preschoolers can do more with a cardboard box, paper bag, foil sheet, lid, tube, plate, or junk-mail envelope than most Thanksgiving craft kits give them credit for. The familiar object is often the best starting point because you already have it, your child understands how to handle it, and you do not need to spend ten minutes gathering special materials.
For ages 3 to 5, the craft can have a little more structure than a toddler version. They can plan a layout, fold, weave broad strips, press texture, build a standing shape, or create a mural with several stages. The project still should not depend on tiny decorative pieces or adult-level cutting.
These Thanksgiving crafts start with normal home or recycling materials. Adult cutting happens before the activity, and paper pieces stay broad. Use washable nontoxic supplies, short painter's tape, jumbo stickers, and smooth household objects. Skip tiny craft feathers, beads, buttons, dried beans, corn kernels, toothpicks, magnets, batteries, loose glitter, and sharp tools. The point is a real project from stuff already in the house.
Give the household object a new job
A cereal box becomes a standing turkey. A paper bag becomes a pocket. Foil becomes a relief panel. The craft feels more substantial because the child is changing a real object rather than filling another blank page.
1. Cereal Box Turkey Stand
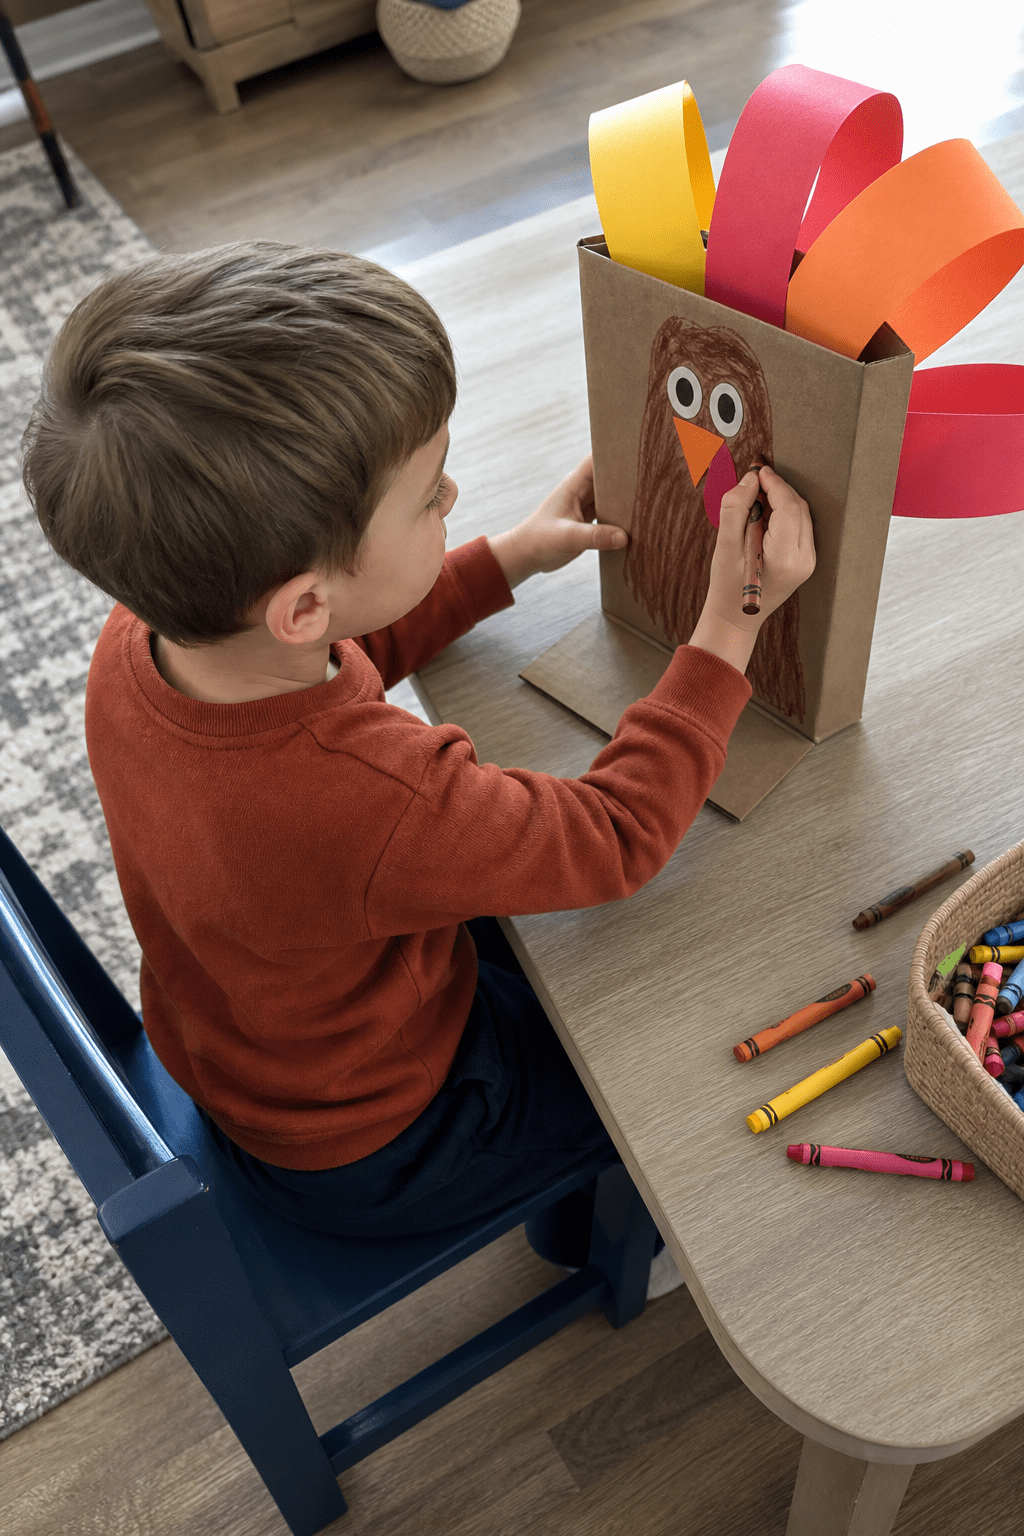
Adult-cut a large flat cereal-box panel into a wide turkey-body shape with a broad bottom tab that folds backward as a stand. At a low table, with your preschooler sitting on a chair, let them cover the cardboard with chunky crayon marks and attach several broad paper tail strips using short painter's tape. The stand can sit on a shelf or table after the craft, then fold flat for storage. Keep every paper piece large and use only clean cardboard with no staples or sharp edges. The child can rearrange the tail before taping it down.
Why it works: The cereal box gives the project enough structure to stand up, which makes a simple recycling craft feel like a real finished object.
Age range tweak:
- Age 3: Color the broad body and press on two or three large tail strips with help.
- Age 4: Plan a fuller tail, decorate the body, and fold the standing tab with help.
- Age 5: Design the color order, test the stand, adjust the tail, and fold the project flat for storage afterward.
2. Paper Bag Thankful Pocket
Flatten a clean paper grocery bag and adult-cut it into one large rectangle with a fold-up bottom flap. At a low table, seat your preschooler on a chair and help fold the flap upward to make a broad pocket. Secure the side edges with short painter's tape. Your child decorates the pocket with chunky crayons and large paper leaves, then slides in one or two blank drawings of people, pets, places, or things they care about. The drawings do not need written labels. Keep the pocket broad, skip staplers and string, and store the finished piece flat.
Why it works: The grocery bag becomes a usable pocket, giving the child a place to keep drawings instead of making another one-and-done page.
Age range tweak:
- Age 3: Decorate the large bag rectangle and place one drawing inside the adult-made pocket.
- Age 4: Help fold and tape the broad pocket, then add several drawings.
- Age 5: Plan the pocket shape, decorate it, make a small set of drawings, and choose where to store the finished piece.
When You Need More Screen-Free Ideas

We made a free Screen-Free Activity Finder for exactly this. Pick your child's age, how much time you have, how much energy they have, and how much help you can give. It'll send you screen-free activity ideas that use normal home materials.
Drop your email and we'll send it over. Unsubscribe anytime.
3. Cardboard Tube Pumpkin Stack
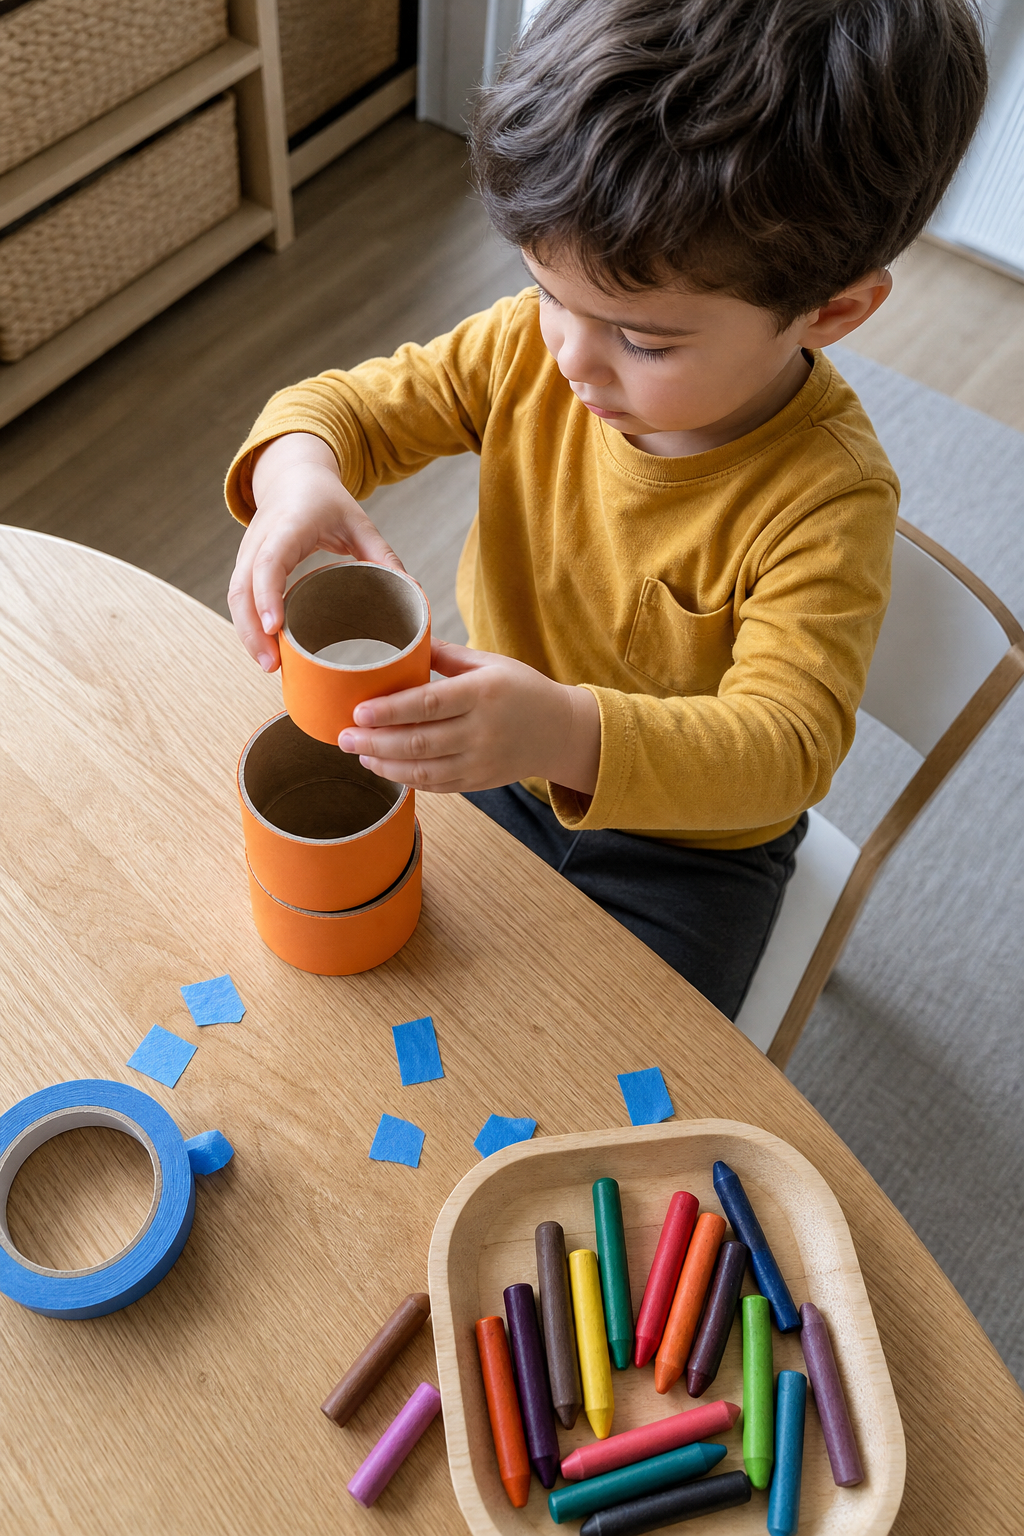
Use three clean cardboard tube sections cut by an adult into wide rings. Wrap each ring with broad orange paper and secure it with short painter's tape. At a low table, with your preschooler sitting on a chair, let them stack the rings, separate them, arrange them side by side, and add broad crayon lines. The pieces can become pumpkins, harvest barrels, or just orange structures. Keep each ring wide enough to handle easily, remove any torn cardboard, and do not add tiny stems or loose decorations. Store the rings nested inside one another when finished.
Why it works: The tube rings create a buildable three-dimensional craft that can be stacked and rearranged after the decorating is done.
Age range tweak:
- Age 3: Decorate and stack two broad tube rings with help.
- Age 4: Wrap and arrange three rings, then rebuild the stack.
- Age 5: Plan a stack or row, add pattern marks, compare structures, and nest the rings for storage.
4. Foil Turkey Relief
Wrap a clean cardboard panel tightly with one sheet of aluminum foil, folding all edges securely behind the board. Adult-place several broad cardboard shapes under the foil before wrapping, such as a large oval body and wide tail strips, so the raised outlines can be felt from the top. At a low table, seat your preschooler on a chair and let them press gently along the raised forms with fingers or a blunt capped marker, then rub broad crayon color over the surface. Inspect the foil often and stop if it tears or creates sharp edges.
Why it works: The hidden cardboard shapes turn foil into a tactile relief project, giving the child a visible transformation from household packaging materials.
Age range tweak:
- Age 3: Press over one large raised shape with fingers while you hold the board.
- Age 4: Find several raised sections and add broad crayon rubbing.
- Age 5: Trace the relief with a blunt capped tool, compare raised areas, add color, and decide where to display the panel.
5. Plastic Lid Harvest Wreath
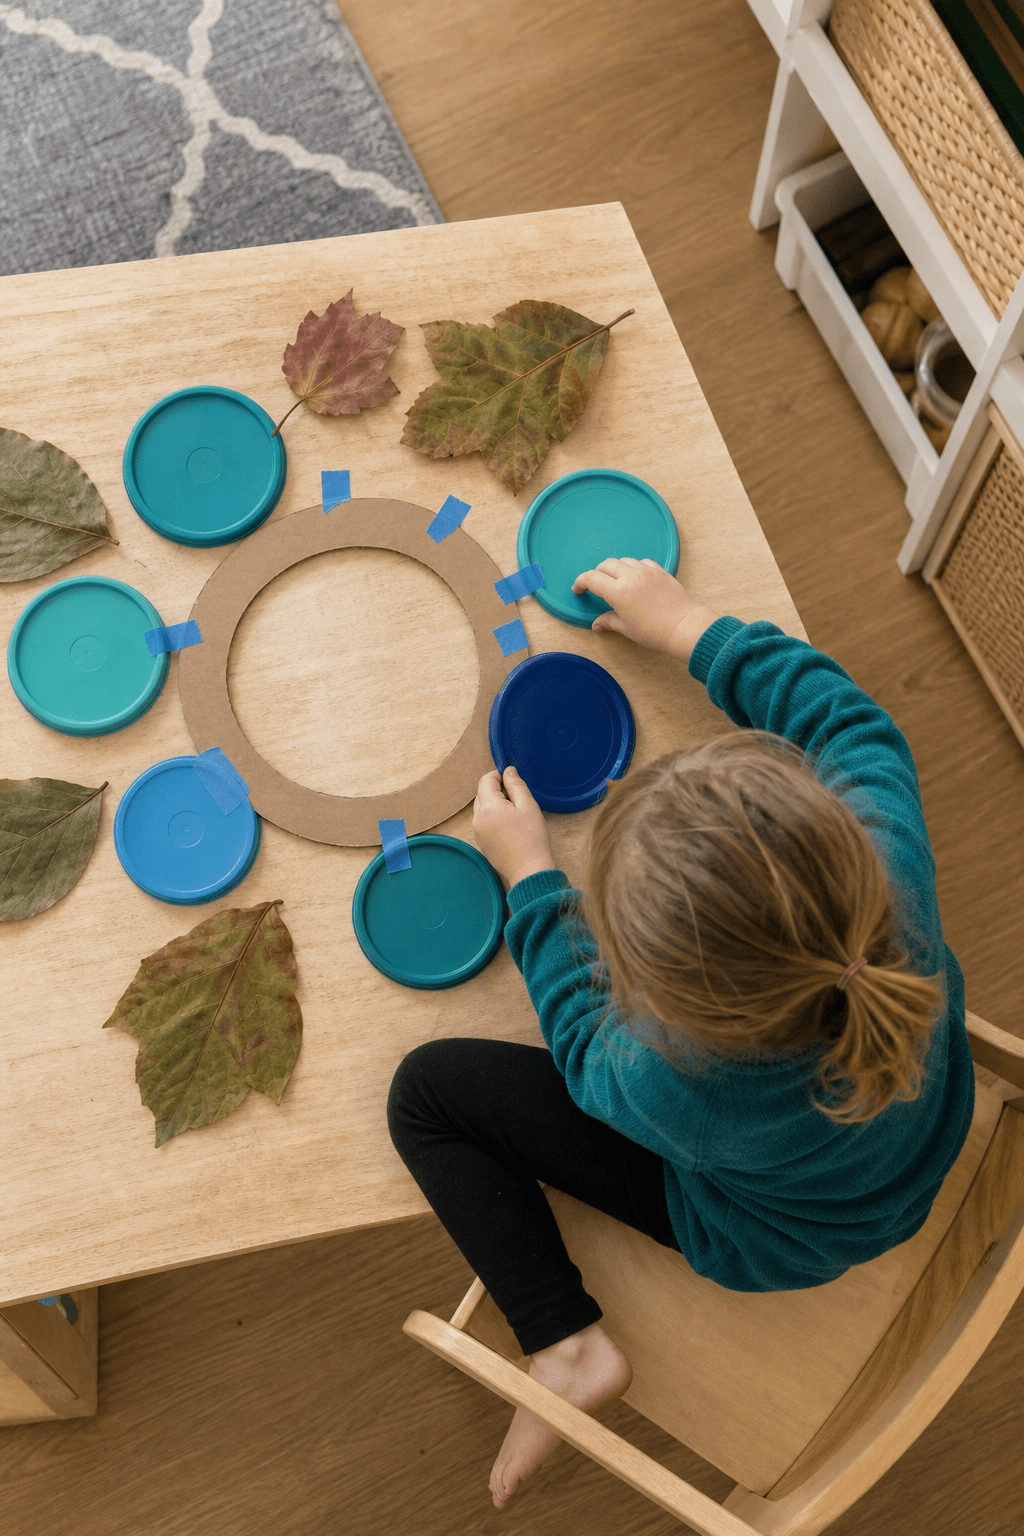
Choose five or six large plastic container lids in different colors and place them around a large adult-cut cardboard ring on the floor or low table. If using the table, seat your preschooler on a chair. They arrange the lids around the ring, move them until the spacing looks right, then use short painter's tape loops placed by an adult to hold the lids temporarily. The lids can be removed and returned to the kitchen later. Skip cracked lids, small lids, or anything sharp. Add broad paper leaves between spaces if you want more color, but keep every piece large.
Why it works: The reusable lids let the child plan a circular Thanksgiving decoration without consuming special craft pieces or committing the household items permanently.
Age range tweak:
- Age 3: Arrange three large lids around part of the cardboard ring.
- Age 4: Plan a full lid circle and move pieces before securing.
- Age 5: Create a repeating color arrangement, add broad paper leaves, photograph the wreath, then return lids to use.
6. Shipping Box Dinner Mural
Open a clean shipping box and use one large inside panel as a floor mural. Adult-draw broad outlines of plates, cups, pumpkins, leaves, or a family table using simple shapes. Your preschooler kneels beside the panel and adds chunky crayon marks, broad paper shapes, jumbo stickers, and short painter's tape strips. The large surface can stay out for a second session, then fold flat when finished. Remove shipping labels with personal information, staples, plastic tape, and rough edges before starting. Keep the box flat so it does not become climbing equipment.
Why it works: The shipping box gives the child a project-sized surface without buying a paper roll, and folding it away creates an easy pause point.
Age range tweak:
- Age 3: Use one large outlined section and a few chunky crayons.
- Age 4: Decorate several broad meal or fall shapes and return for a second round.
- Age 5: Plan different mural zones, add broad movable paper pieces, revisit the mural later, and help fold the box for recycling.
7. Paper Plate Folded Turkey
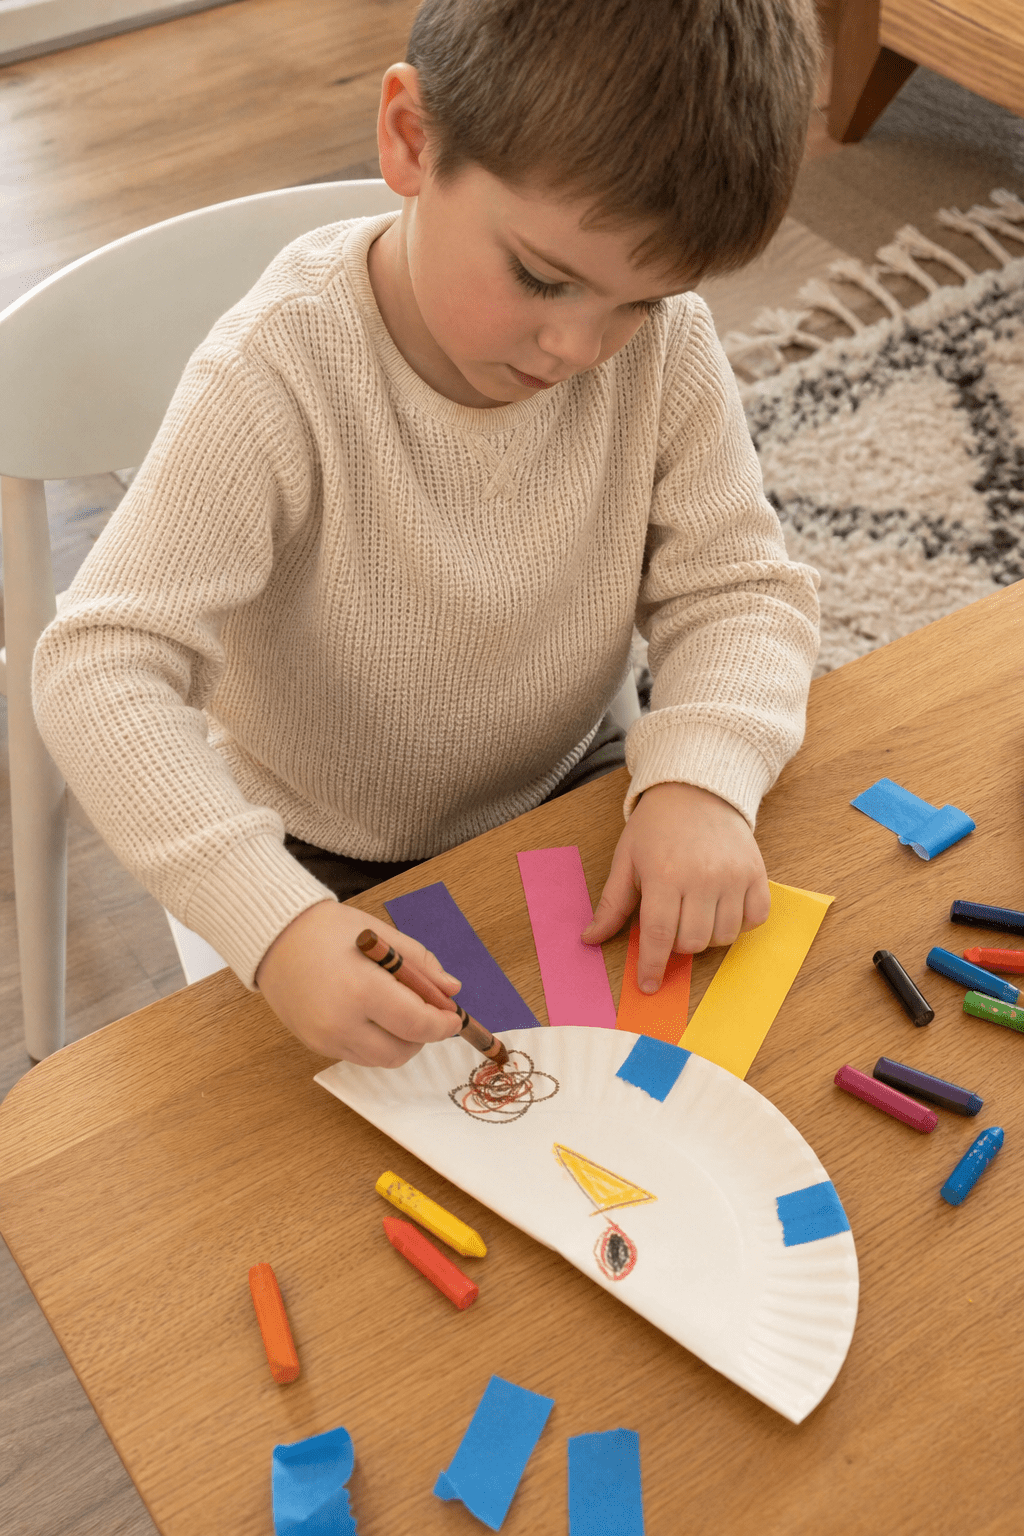
Give your preschooler one plain paper plate at a low table, with the child sitting on a chair. Fold the plate gently in half and open it again so there is a clear center crease. Let them color both halves, then adult-cut four broad paper tail strips that slide under the back edge and are secured with short painter's tape. The plate can stand slightly open along the fold or lie flat. No glue, tiny feathers, or googly eyes are needed. Keep the tail pieces wide, collect tape scraps, and let the child change the strip order before securing them.
Why it works: The fold adds structure to a common paper plate and gives the finished turkey a three-dimensional shape without specialty supplies.
Age range tweak:
- Age 3: Color the plate and add two broad tail strips with help.
- Age 4: Use the center fold, arrange several tail strips, and choose the final order.
- Age 5: Plan both plate sides, test the standing fold, rearrange the tail, and store the craft flat afterward.
8. Junk Mail Pumpkin Weave
Use a large clean junk-mail envelope or sturdy advertising postcard turned to the blank side. An adult cuts four or five broad horizontal slots into the cardboard backing and several wide orange paper strips from scrap paper. At a low table, with your preschooler sitting on a chair, the child weaves each wide strip over and under the slots, pulls it through, and changes the order for a second attempt. Keep the strips broad and the slots wide enough for easy hands. Hide or remove personal information, and skip glossy pieces with sharp torn edges.
Why it works: The recycled mail becomes a weaving base, giving preschool hands a real over-under project without a purchased loom or tiny strips.
Age range tweak:
- Age 3: Weave two very broad strips through wide adult-cut slots with help.
- Age 4: Work several broad strips across the blank backing and pull them through.
- Age 5: Plan the color order, complete the weave, remove and rebuild one section, and recycle the leftover mail.
9. Egg Carton Pumpkin Row
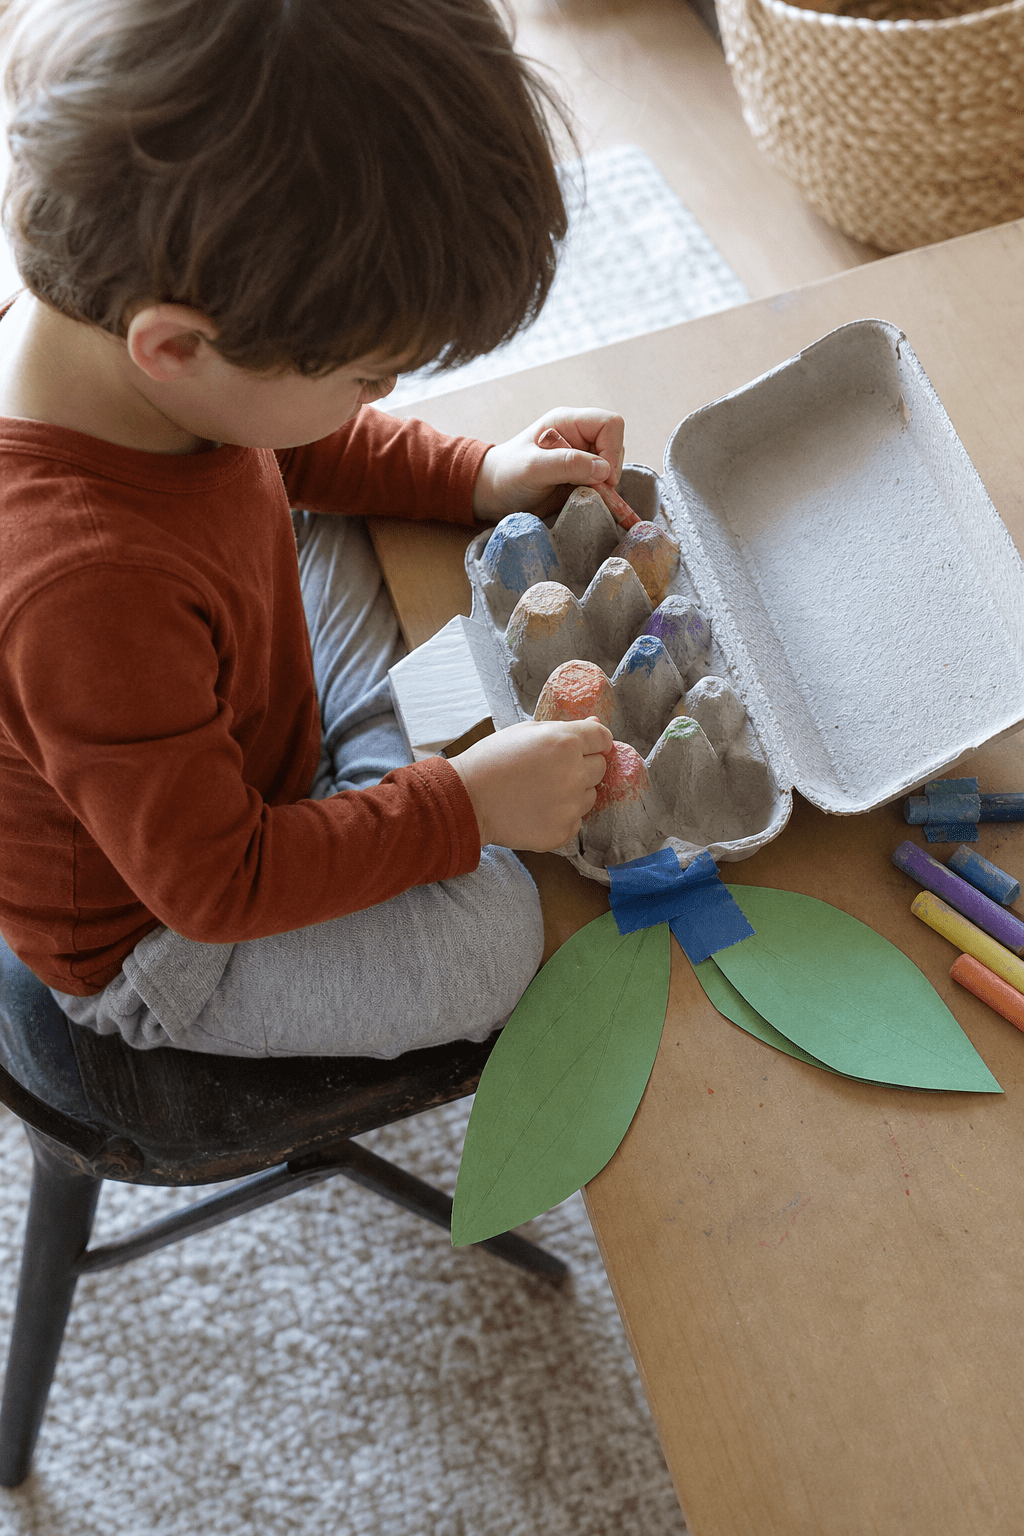
Use one clean empty cardboard egg carton with the lid attached and all labels removed. Keep the carton whole rather than cutting individual cups apart. At a low table, seat your preschooler on a chair and let them color the raised cup sections with washable markers or chunky crayons so the row looks like a patch of pumpkins. They can close the lid, reopen it, compare the inside and outside, and add broad paper leaves with short painter's tape to the lid if desired. Stop if the carton begins tearing into small pieces or your child mouths cardboard.
Why it works: Keeping the carton intact turns a familiar recycling item into a structured row craft without creating loose small cardboard cups.
Age range tweak:
- Age 3: Color two or three raised sections while the adult holds the whole carton steady.
- Age 4: Color across the full row and open and close the attached lid.
- Age 5: Create a color pattern across the row, decorate the lid, compare both sides, and recycle the carton when finished.
The Bottom Line
Household materials can make Thanksgiving crafts feel more substantial, not less. A box can stand up, a bag can become a pocket, foil can hide raised shapes, and a tube can turn into a stackable build.
The object gives the project structure before your child even starts. That means less prep for you and more actual making for them.
Use adult cutting where needed, keep the pieces broad, and let the child own the arranging, coloring, folding, weaving, and rebuilding.

Want to have these ideas in one place, customized for your kid in just a click? Grab our free Screen-Free Activity Finder.
One mom told us: "My kid was about to have a full meltdown and I had nothing. Pulled up the Screen Free Activity Generator and it gave me 'Tupperware Tower Challenge.' I dumped every plastic container from my kitchen on the floor and told her to stack them. She went from tears to totally absorbed in about 30 seconds. Spent 25 minutes stacking, crashing, matching lids. I just sat there drinking my coffee. Sometimes the simplest stuff works the best."
The Screen-Free Activity Finder is free. Put your email in below and we'll send it over.